
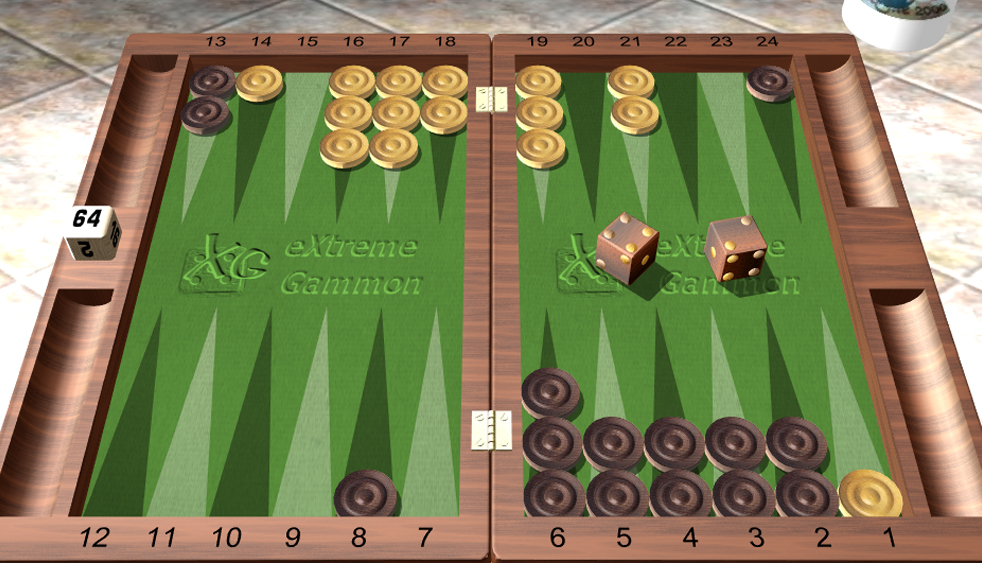
As brown I was leading yellow 5-2/7 and had this tricky 4-2 roll to play. It should be readily apparent that yellow is poised to complete a six-prime, and brown needs to urgently address this threat. It may seem natural for brown to step up to yellow’s 5-point with the four, but this simply invites an attack after which yellow should have plenty of time to escape the back checker. I can also consider trying to aggressively counter-prime by slotting the bar with 13/7 (this was my actual play after expending a lot of energy and a few minutes on my clock). The idea behind this play is to duplicate the sixes that yellow needs to escape, and also may need to secure the five-point. If missed, I should now be a favorite to construct a six prime of my own. I also considered the unconventional play of breaking my home board to hit on the one-point, but ultimately rejected this notion as it might invite the cube and a costly gammon which could propel my opponent to the Crawford game. Surprisingly, a simulation reveals that any play which doesn’t involve hitting is a blunder! While there are several possible alternatives that include hitting, 8/4, 3/1* offers the right amount of diversification if yellow should be unable to enter from the bar. Volunteering two blots may seem suicidal, but it provides a direct winning path for brown and may even include a fair number of gammons that could end the match. This fact raises another fascinating point. If brown hits, yellow should definitely turn the cube to leverage the value of their own gammons while also killing the value of gammons for brown (as a doubled cube already wins the match for brown). Ironically, my slotting play of 13/7 may stave off my opponent’s cube as it leaves yellow with a more borderline doubling decision – although it is a clearly inferior play from a match-winning-chance perspective.

Frank is a two-time winner of the Backgammon World Championship in Monte Carlo and current holder of the title. He is a strategic consultant for professional sports teams, and within the sports betting and gaming industries. His work in decision science, critical thinking and sports analytics has been featured in many major news media outlets including ESPN, NFL Network, the New York Times, Fox Sports, Esquire, the Ringer and Showtime. He proudly serves as the co-director of the San Diego Backgammon Club. Learn more: https://frankfrigo.com/
So, is 24-20, 3-1* TOO big? If he doubles, drop for a one point loss. However, he might not double, deciding to go for a gammon, and then miss. whoo-hoo. Worst case, it will be a gammon on an unturned cube because he didn’t double and hit.
Your play is definitely a leading candidate with the other hitting plays. However, there is ample time for the escape of the back checker after a fan. Stepping up 24/20 is more of a liability than an asset as it creates double hitting opportunities for the opponent. Once you decide to hit aggressively, the focus becomes the home board and the close out.